GPSLog Labs Blog

GPSLog Labs Blog

New features and tips for using gpsloglabs.com

Filed under

tips

Updates for November 10th

Some recent updates to GPSLog Labs:

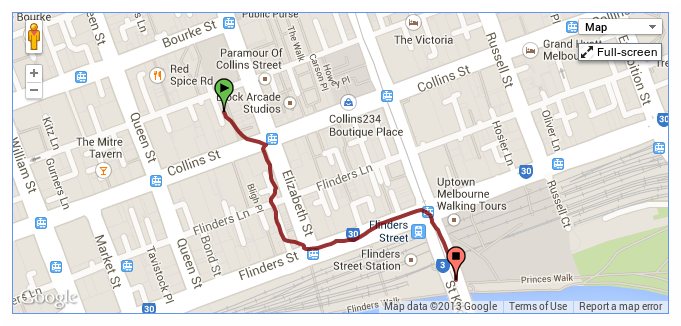
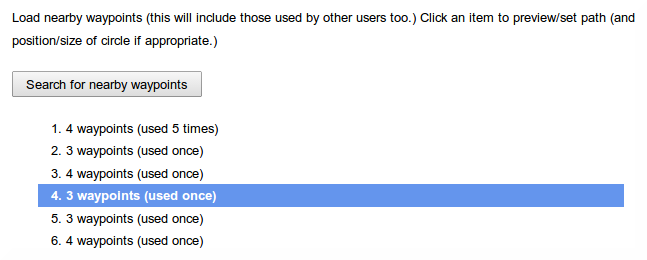
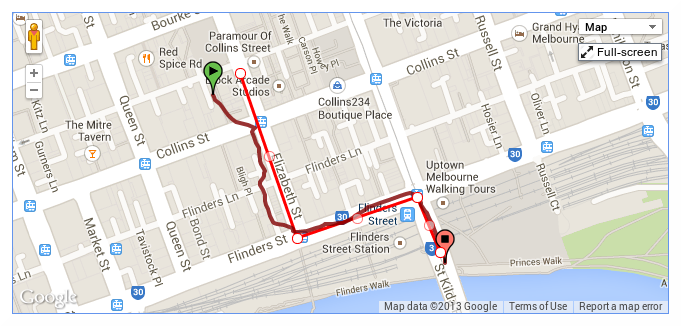
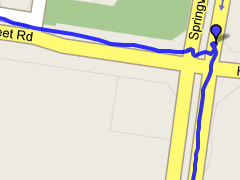
  • When filtering a log file using a time or position filter, you can now copy nearby waypoints, rather than drawing the line each time.

    Once you zoom into/select the area to be filtered, click the "Search for nearby waypoints" button.

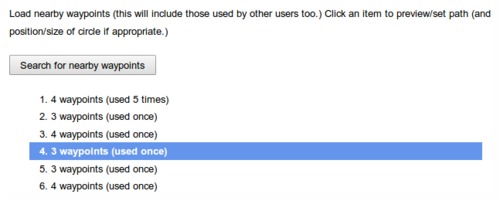
    This will list all the nearby waypoints and you can click on them to copy them into your filter.

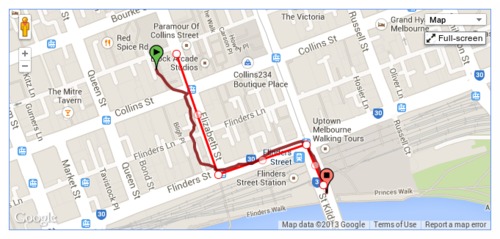
    This search uses not only waypoints you've created before, but also those created by all the other GPSLog Labs users, so you can take advantage of paths others have marked and save yourself some effort.

  • New forward vs reverse performance chart for routes.

    This graph compares the forward speed with the reverse speed for any days where you go in both directions on the route. E.g. a commute to and from work.

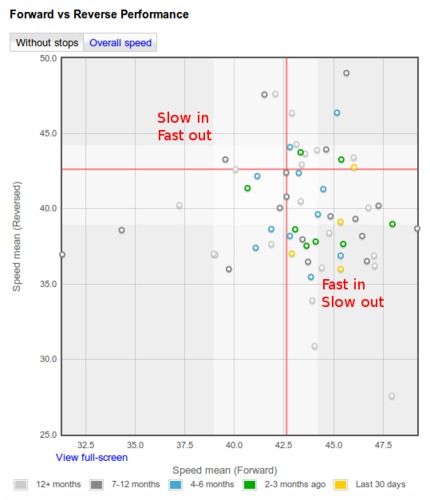
    The shading on the graph represents the 25th—75th percentile of the data, the red line indicates the median speed.

    Points in the bottom-right represent fast forward direction with a slow log in the reverse direction, while the points in the top-left are slow forward and fast reverse. (Note, this description is flipped for pace formats.)

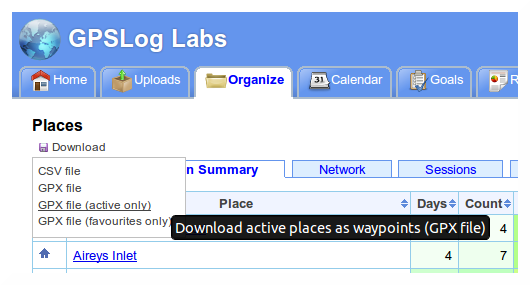
  • Download places as waypoints in a GPX file that you can load into your GPS to assist with navigation and route planning.

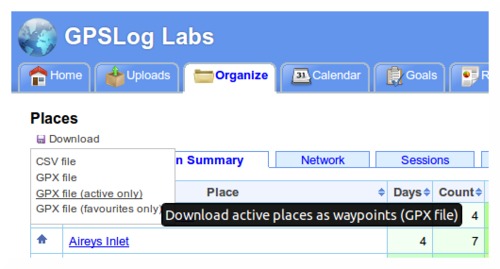
    The Places page has a new "Download" menu that lets you generate a GPX file containing waypoints for each of the places you have created.

    You can choose to get all your places, just the active places or just your favourites.

    This menu also incorporates the CSV download option which will get all your place information into a spreadsheet.

  • Downloaded zip files now have modified dates of the files set to the current date/time.

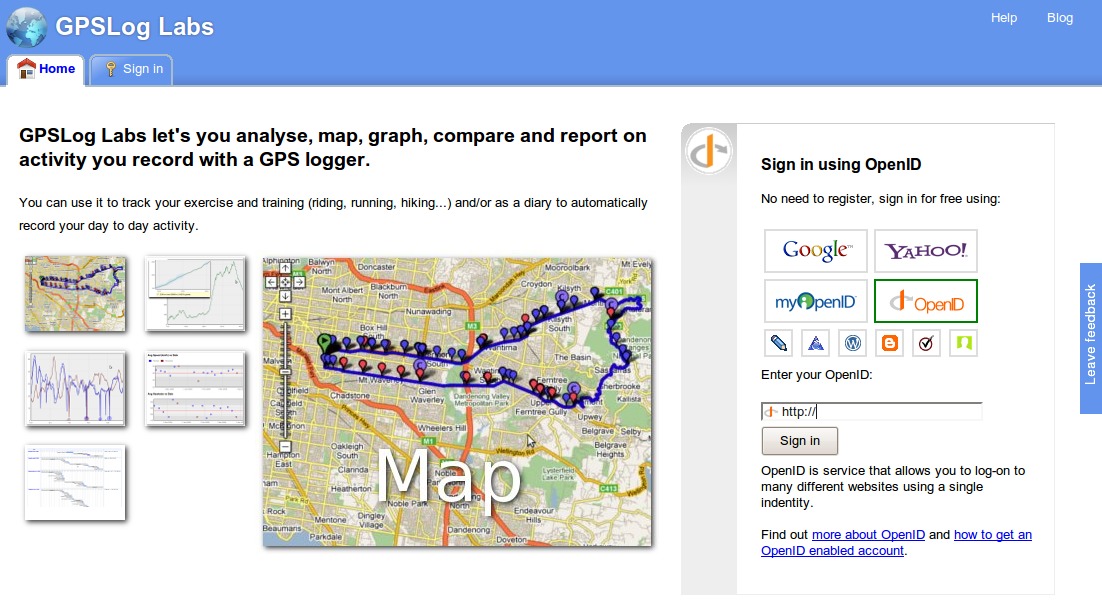
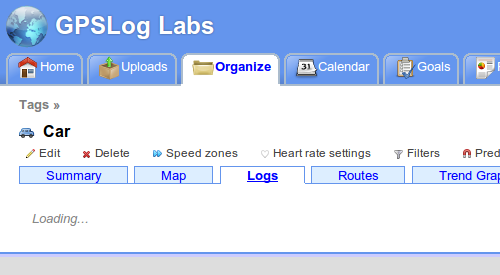
  • The tabs on various pages around the site now load dynamically, so you'll notice a little "Loading..." message after the tab is clicked. You can then quickly switch between the tabs without waiting for the whole page to load again. This is very handy when comparing the heart rate graph with the altitude profile or speed graphs, for example.

  • And lastly, a little tip:

    Set a place radius to 1m to prevent it being used to cut activity without having to mark it as inactive. This will still allow you to select the place as a start/end point manually.

    This can be handy if you pass by a place on a regular commute and don't want to have to remove the stop from your processed activity.

Filed under  //  changelog   routes   filters   position filter   time filter   places   waypoints   tips  

Getting started (a quick tutorial) [Updated]

The old tutorial is getting a bit out of date with all the new features and changes to the look of the site, so here's an up to date version:

Signing up and using GPSLog Labs is really easy.

First, go to GPSLogLabs.com and sign in using any OpenID account:

Depending on your OpenID provider, you may be asked to put in your name and email address to finish creating your account. Or you may just need to choose whether you want your logs shown in kilometers or miles.

Next, click the Upload Log button and choose your log file. Put in a name to identify your GPS logging device too.

The file will take a little while to upload, then a page will appear that will automatically detect the log file format.

If there are multiple formats, you can click "Show detailed results..." to see an indication of the data extracted from the file to see which is most useful:

Once you select the format which imports the data best, the file will appear in the Uploads tab.

After a few seconds, the file should be processed, click the log file name to begin editing the extracted activity.

The log file detail page has two tabs, "Log File Summary" shows the unedited contents of the log file, and "Edit Processed Activity" shows the extracted activity which you can edit if necessary.

GPSLog Labs automatically breaks activity into segments, such as time at the start place of the log (locking the door, waiting for the logger to lock on, stretching etc.), the time between places (the interesting bit, and the time at the end place. Click on the first unnamed place to give it a name.

The street address and timezone will be looked up automatically. You should change the place name to something meaningful and shorter.

You can move the place marker if you need to, and change the "capture radius" for the place, but the default is usually fine. Moving the place will cause the file to be reprocessed and you'll have to click through from the Uploaded Log Files page again once it's done.

After naming the place, the activity will be updated accordingly. You may need to name other places that appear in your log as well.

The next step is to name the route. Routes are used to classify and group activity that follow the same general path.

Save and the edited activity will now display your new route:

You can also tag the activity according to it's type/purpose.

By default, activity tagged with the Run tag will be displayed in "pace" format:

Back on the Uploaded Log Files page, the log file will now show up as blue (instead of yellow) to indicate it has been edited.

Your activity is also visible in the rest of the system classified by places, routes and tags. For example, the home page will show you a summary of your activity for the past week:

And from any of these places, you can follow the links through to an "activity detail" page that will let you see detailed maps, graphs and statistics:

This is only a very small sample of what GPSLog Labs can do, you can also filter noisy GPS signals from your data, plan and track your training towards goals, and share your activity with your friends.

So, give it a try yourself and let me know what you think.

Filed under  //  tips   tutorial   uploading  

New Feedback Forum

GPSLog Labs now has a new Feedback forum, hosted on Idea.Informer.com.

You'll see a new button on the right hand side of the page where you can quickly leave feedback.

On the forum, you can see feature requests and bug reports other people have made and vote for them or add your comments.

Filed under  //  changelog   documentation   feedback   help   tips  

LoadMyTracks software for Mac users

If you're a Mac user, you may want to have a look at LoadMyTracks. It lets you quickly and easily download data from Garmin and other GPS logging devices over USB or serial connections and you can then quickly upload the data to GPSLog Labs.

LoadMyTracksWindowLarge.jpg

Filed under  //  devices   Garmin   LoadMyTracks   Mac   tips   upload   uploading  

Uploading by email

You can upload logs directly to GPSLog Labs from your iPhone or similar mobile device using your unique email upload address.

Click on your device icon on the home page to find your device's unique address. It will look something like upload+abcdef123456zyxwvu987654@gpsloglabs.com.

Simply send the log file or files as attachments (zipped if you like, it'll be faster that way) and then you will receive an email containing links to the activity in GPSLog Labs once it is processed.

You can add tags to your activity by entering them in the subject line like: ((tags: Bike)) The tags will be matched as smartly as possible, you only need to put enough of the tag in to make it unambiguously match one of your existing tags and the text case doesn't matter.

The rest of your email title will be added as a note on the activity.

Filed under  //  email   iphone   mobile   tags   tips   uploading  

Cleaning up a bad GPS log file

On a run the other day, my GPS logger (an AMOD AGL3080) recorded a really noisy signal and the resulting trace was inaccurate for the first 10 minutes. I have no idea why it did this, the second 10 minutes were fine.

The end result was a log which was almost unusable, the distance recorded was twice what it should be and the average speed was way off.

By experimenting with the Speed Filter I was able to find a set of filters that cleaned the log up remarkably, meaning I could include it in my training stats after all. The following graph and map show the discarded points and the resulting "cleaned" data:

Screenshot-filter-before-after

The red points are discarded by a Radius Filter as that section of the route goes down a lane-way where the signal is generally very bad.

The green points are discarded by the Speed Filter and show how bad the signal was for the first 10 minutes.

The speed is smoothed with a 10 second Speed Median filter too, but the discard filters do the bulk of the work.

I had to experiment with the Speed Filter parameters by varying the cut-off speed until the log's distance was correct (based on previous logs along the same route). When the cut-off was too high, the resulting distance was still too long, and when it was too low, too many points were discarded and it was too short. Once the distance was right, the resulting average speeds were reasonable enough for me to be able to use them. As the table of before and after stats shows, the results were pretty dramatic:

0screenshot-filter-before-after

This is the most successful filtering of a log I've seen so far, generally it's removing much smaller amounts of noise, and it's great to know it can be this powerful. I hope some other GPSLog Labs users can get similar results too as it's very frustrating when a log of your activity doesn't record well and is unusable.

Filed under  //  discard filters   filters   position filter   speed filter   tips  

Upload form redesign and a bit about Devices

I've changed the GPSLog Labs upload form a little, partly to make it nicer looking and less cluttered, but mostly to make the purpose of Devices a little clearer.

Previously, the choice of device to upload to wasn't shown on the form if you had only one device, and now it will always be given.

To process the log files you upload, the system needs to know what the format of the file is. When you first upload a file, there is a page that automatically detects this format, but that isn't practical to do for every file that is uploaded, so the setting is stored in a "device". This means that each device can handle one format only, and therefore, if you want to upload files with a different format you'll need to create another device to do so.

The other purpose of devices is to track battery life. If you upload all logs you record, then GPSLog Labs knows how long your logger has been switched on so can predict how much time you have before you need to recharge/replace your batteries and therefore prevent you getting a flat battery in the middle of an activity, which can be rather frustrating!

When the logged usage goes over 75% you'll get a warning:

Marking the point where you recharged or replaced your batteries is easy too:

Filed under  //  batterycycles   changelog   devices   log formats   tips   uploading  

Tag and route inference

GPSLog Labs has always made some basic attempts to automatically assign a route for a log segment if it can:

  • If there is a single route between the start and end places of the log it will be assigned automatically.
  • If there are no routes between the start and end places, one will be automatically created and assigned.

And now I've just added an experimental feature that will try to guess the route after you assign a tag. This is useful in those cases where you have 2 (or more) routes between places, say one by car and one by bike. The above automatic assignment won't work in these cases, but if you tell it whether it was by bike or car by tagging the route, it will look again for routes using only the assigned tags.

This works in reverse too, if you assign a route that always has a particular tag associated with it, then the tag will be automatically filled in too.

So, it'll vary depending on your setup, but you should be able to select the route in many cases and have the tags automatically assigned and select the tag in other cases to have the route automatically assigned.

Let me know if you come across any issues with this change, and hopefully it makes things a little easier.

Filed under  //  changelog   routes   tags   tips  

Getting started (a quick tutorial)

Note: An updated version of this tutorial is now available.

Signing up and using GPSLog Labs is really easy.

First, go to gpsloglabs.com and sign in using any OpenID account:

Depending on your OpenID provider, you may be asked to put in your name and email address to finish creating your account. Or you may just need to choose whether you want your logs shown in kilometers or miles.

Next, click the Upload Log button and choose your log file. Put in a name to identify your GPS logging device too.

The file will take a little while to upload, then a page will appear that will automatically detect the log file format.

Click the button for the format which imports the data best and the file will now appear in the Uploaded Log Files tab.

After a few seconds, the file should be processed. During this step, GPSLog Labs will identify the start and stop locations of your activity and break the file up into segments.

This will highlight any issues GPSLog Labs has had processing the file, and in particular, since this is the first log uploaded, the start and end places need to be named. Click the log file name to begin editing the extracted activity.

The log file detail page shows the contents of the log file at the top, and the extracted activity at the bottom. Activity is broken into time at the start place of the log (locking the door, waiting for the logger to lock on, stretching etc.), the time between places (the interesting bit, and the time at the end place.

Click on the first unnamed place to give it a name.

The street address and timezone will be looked up automatically. You should change the place name to something meaningful and shorter.

You can move the place marker if you need to, and change the "capture radius" for the place, but the default is usually fine. Moving the place will cause the file to be reprocessed and you'll have to click through from the Uploaded Log Files page again once it's done.

After naming the place, the activity will be updated accordingly. You may need to name other places that appear in your log as well.

The next step is to name the route. Routes are used to classify and group activity that follow the same general path.

You can also tag the activity according to it's type/purpose.

You can click on the activity thumbnail to popup a more detailed map of any segment to help identify the activity. From that popup you can also click through to the activity detail page.

Back on the Uploaded Log Files page, the log file will now show up as blue (instead of yellow) to indicate it has been edited, and the Places, Routes and Tags indicator icons on the right hand side will go green.

Your activity is also visible in the rest of the system classified by places, routes and tags.

So, give it a try yourself and let me know what you think.

Filed under  //  tips   tutorial   uploading  

Map controls

There are a couple of not so obvious features on the maps that GPSLog Labs uses.

For speed reasons, the maps that are drawn have been "simplified", i.e. the number of points in the track has been reduced to speed up drawing and data transfer.

Unenhanced-map

For most purposes, this will be fine, but if you want to zoom in and see the full detail of your track, there is a button on the map to "Enhance" the detail.

Enhance-map-screenshot-1

This will reload the page with the full log data mapped for the region displayed in the map. This means it's still pretty fast, but you can't pan too far or you'll need to click the enhance button again to reload more data.

Enhanced-map

Additionally, on the built in pan tool is a "return to the last result" button. Clicking this will undo any zooming and panning you may have done and return the map to the original view when the page was loaded.

Return-to-last-result
Filed under  //  changelog   maps   tips  
Older posts →

© 2013 Tom Paton | GPSLogLabs.com | Source | Feedback | RSS | Subscribe