Getting started (a quick tutorial)
Note: An updated version of this tutorial is now available.
Signing up and using GPSLog Labs is really easy.
First, go to gpsloglabs.com and sign in using any OpenID account:
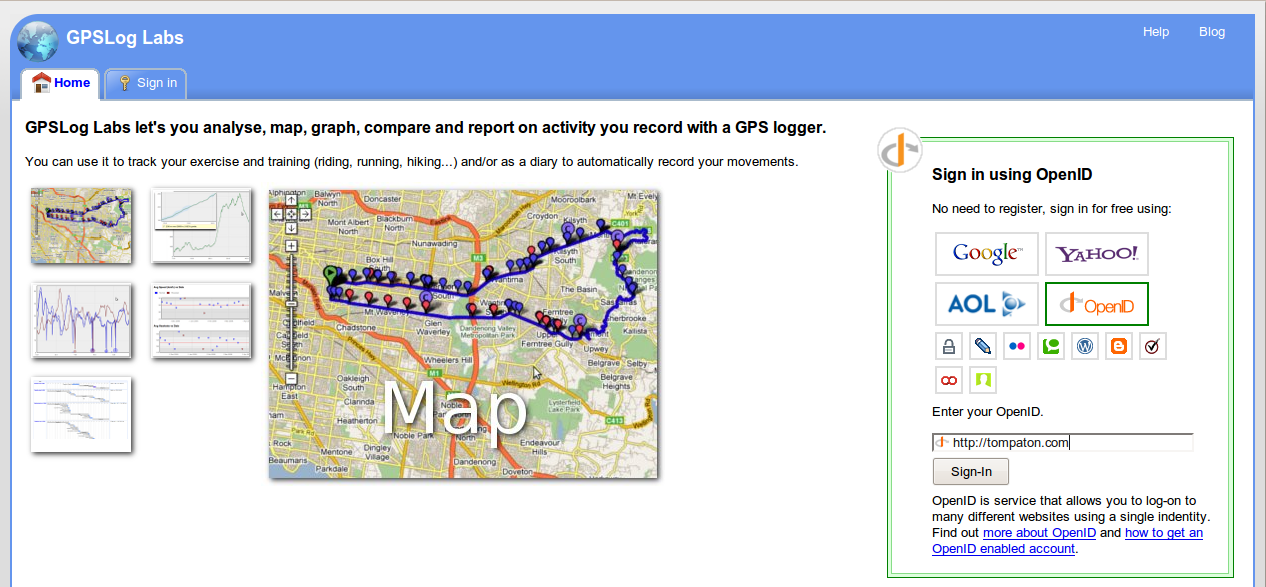
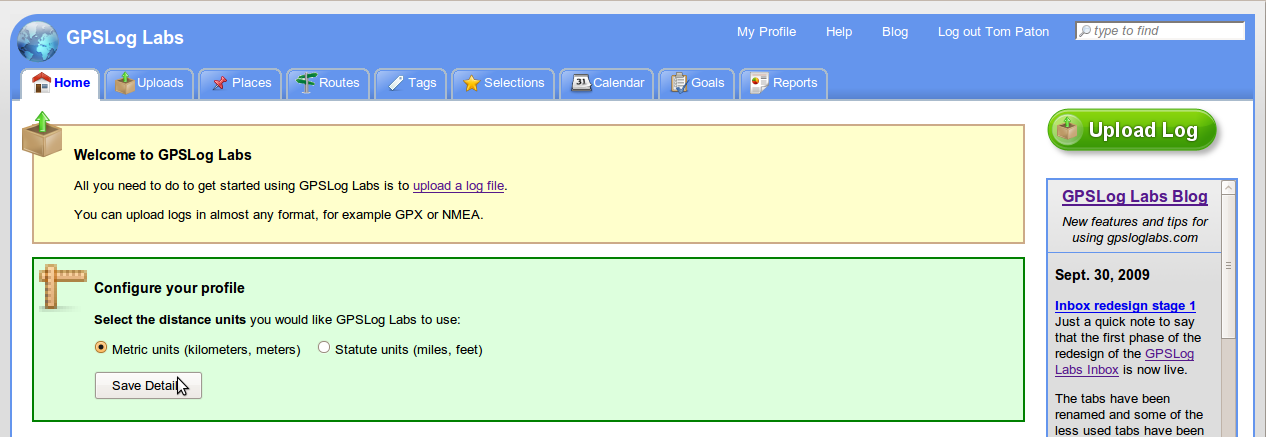
Depending on your OpenID provider, you may be asked to put in your name and email address to finish creating your account. Or you may just need to choose whether you want your logs shown in kilometers or miles.
Next, click the Upload Log button and choose your log file. Put in a name to identify your GPS logging device too.
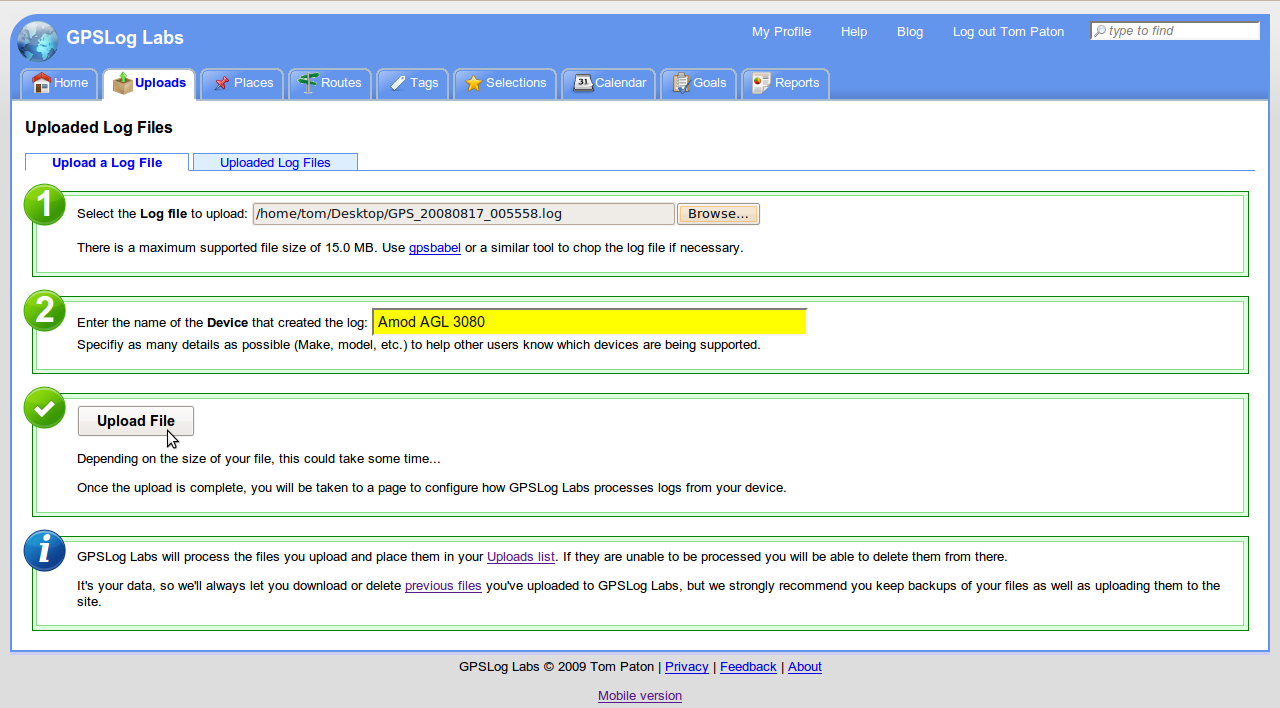
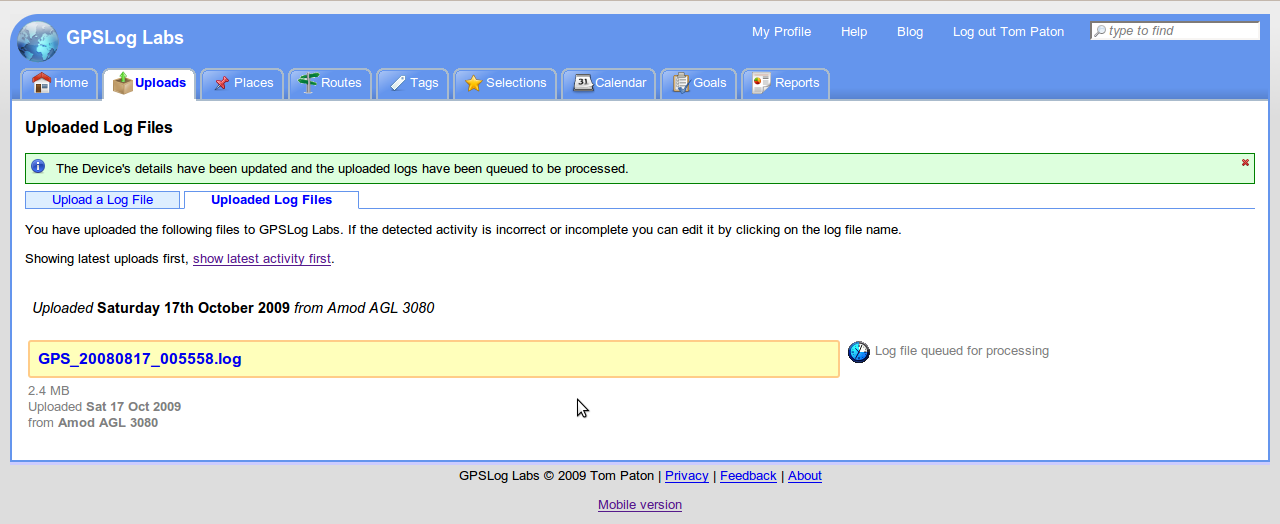
The file will take a little while to upload, then a page will appear that will automatically detect the log file format.
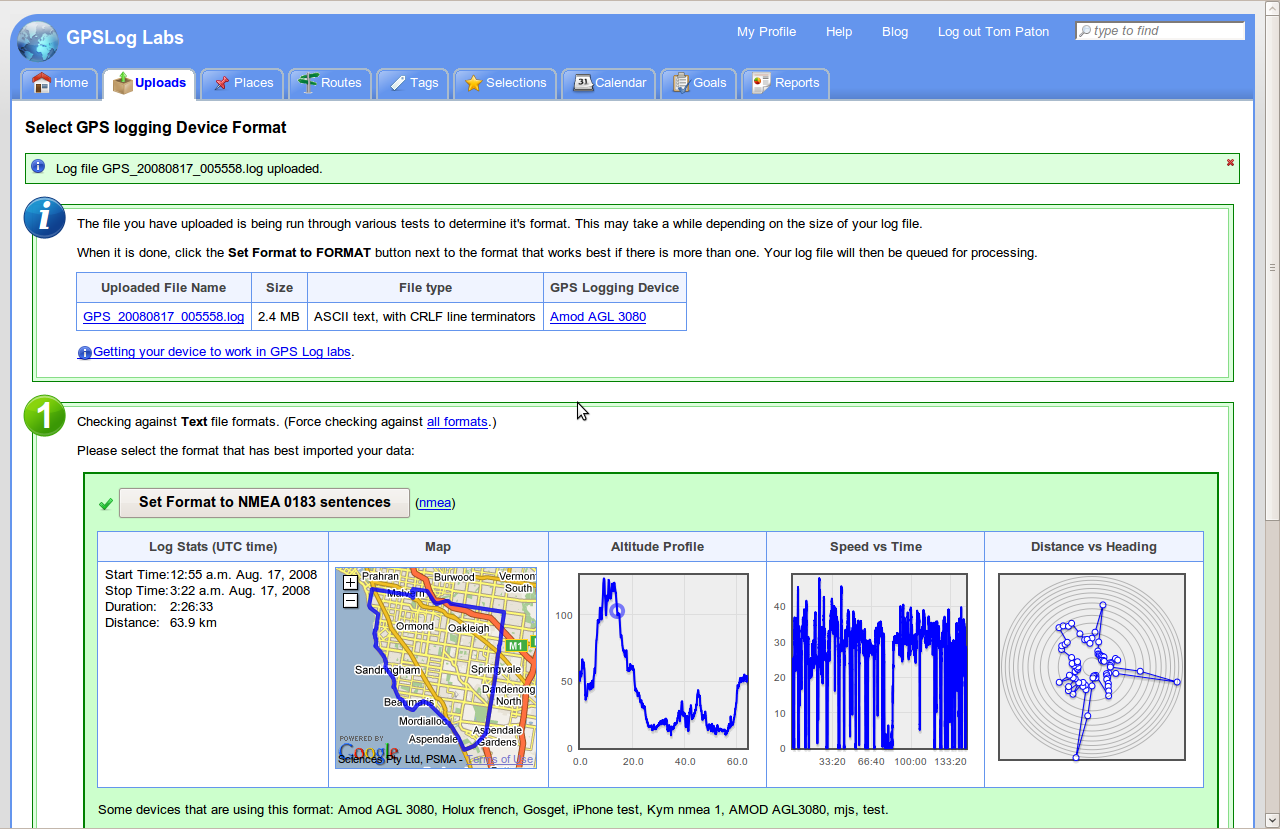
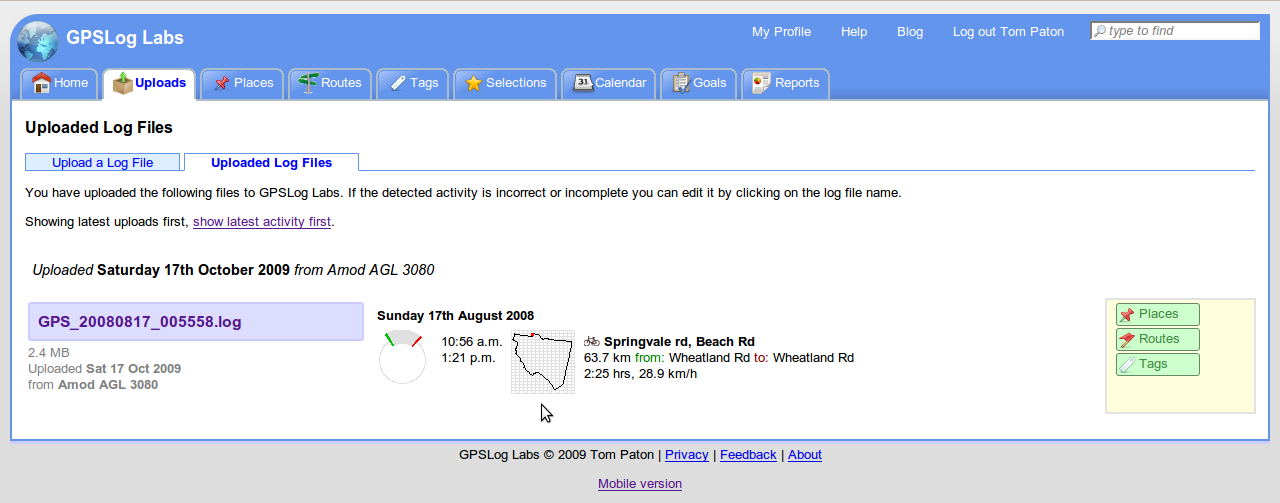
Click the button for the format which imports the data best and the file will now appear in the Uploaded Log Files tab.
After a few seconds, the file should be processed. During this step, GPSLog Labs will identify the start and stop locations of your activity and break the file up into segments.
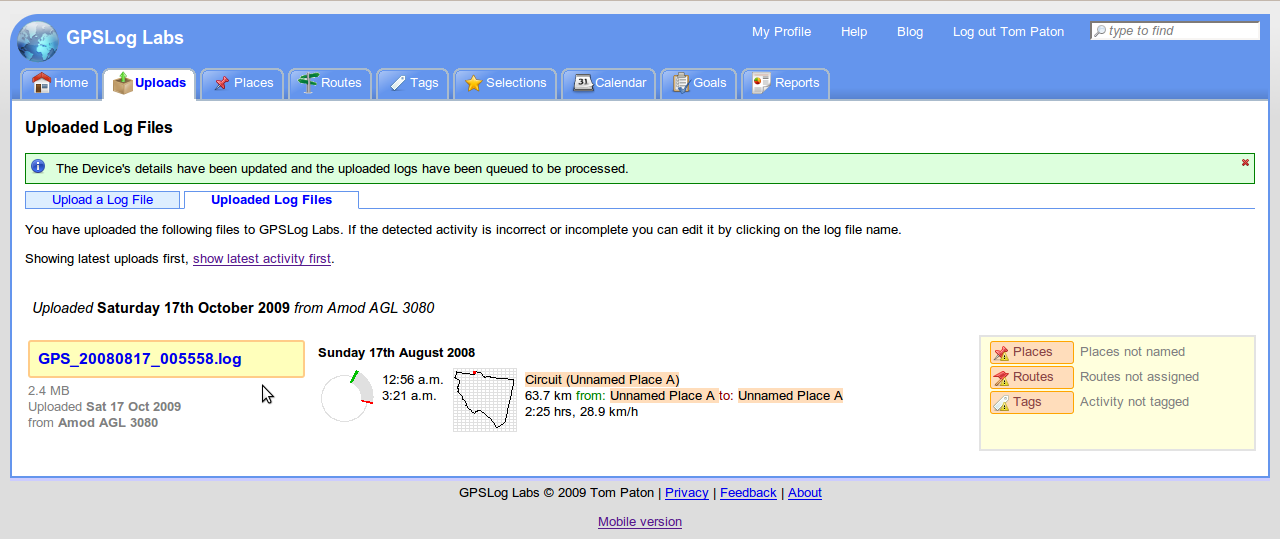
This will highlight any issues GPSLog Labs has had processing the file, and in particular, since this is the first log uploaded, the start and end places need to be named. Click the log file name to begin editing the extracted activity.

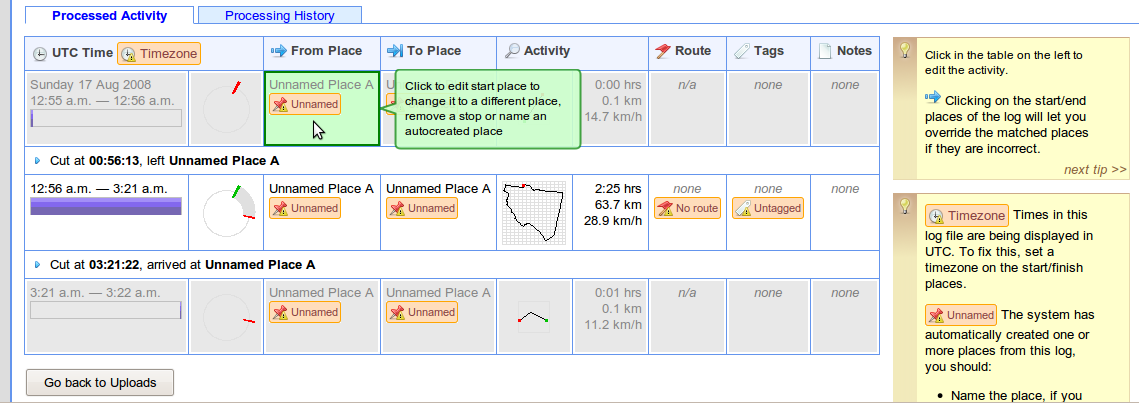
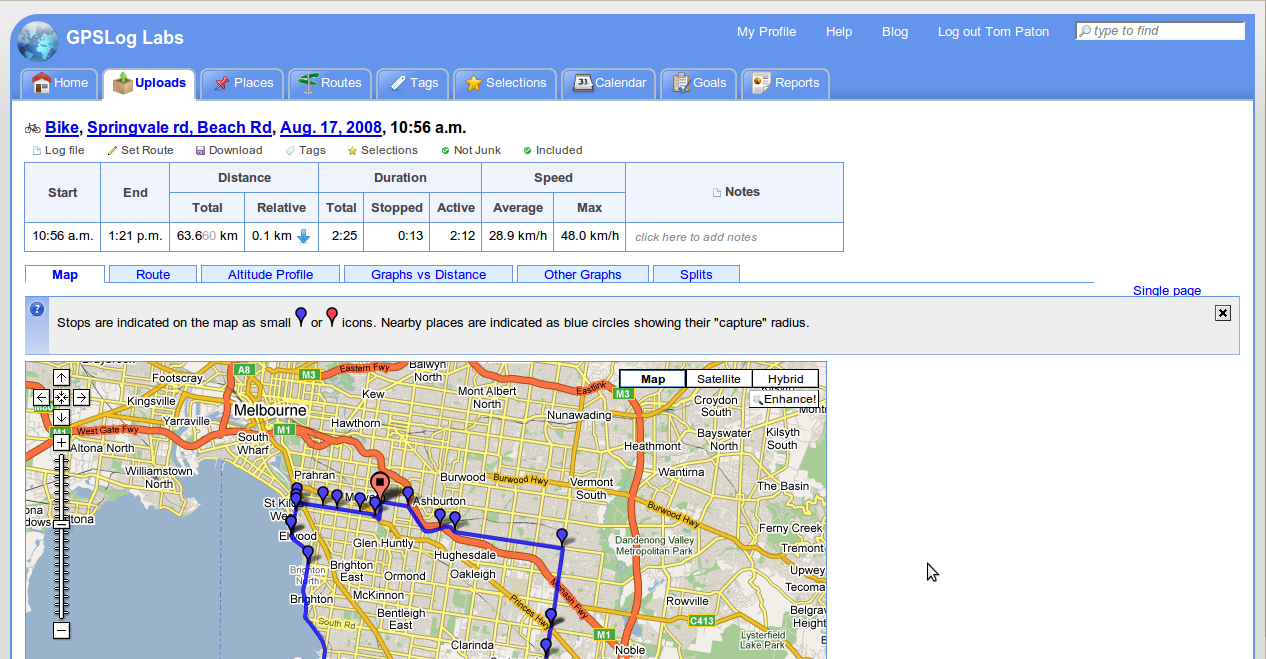
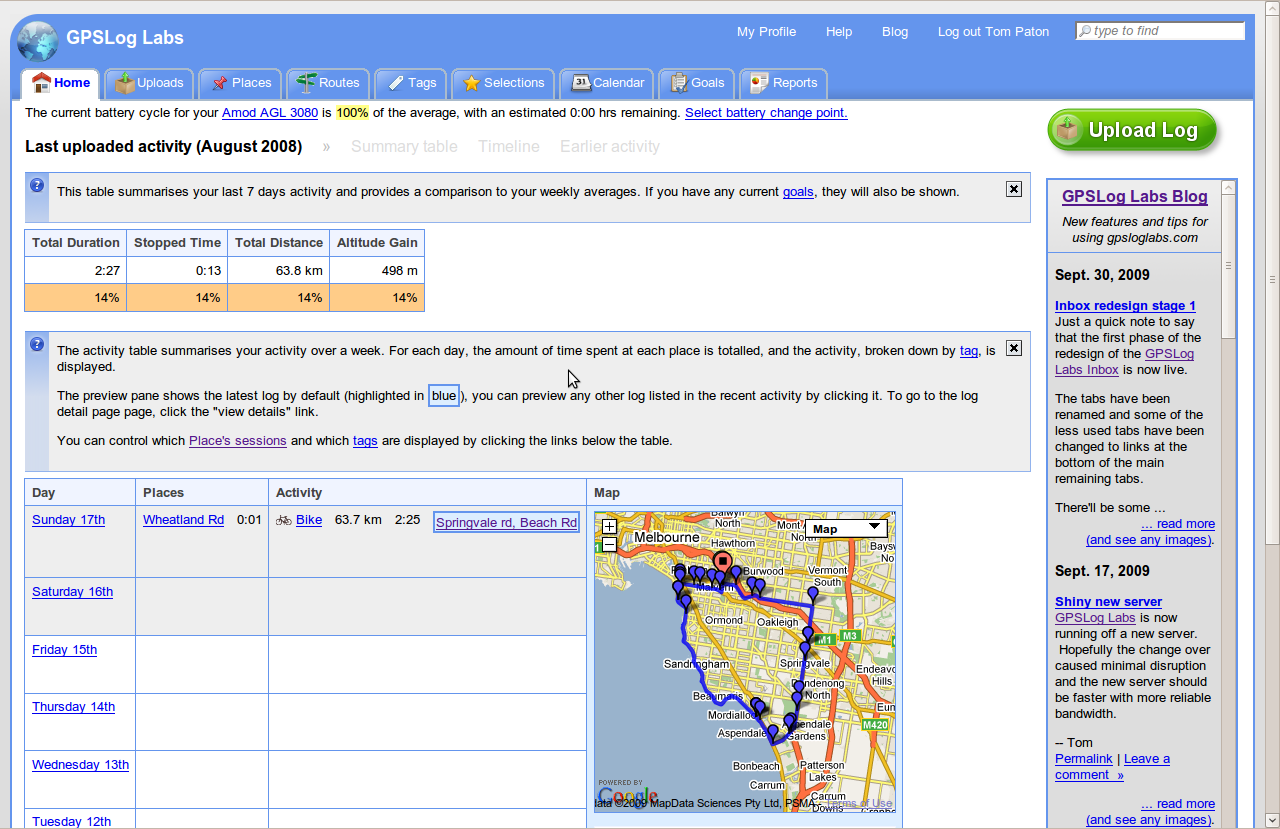
The log file detail page shows the contents of the log file at the top, and the extracted activity at the bottom. Activity is broken into time at the start place of the log (locking the door, waiting for the logger to lock on, stretching etc.), the time between places (the interesting bit, and the time at the end place.
Click on the first unnamed place to give it a name.
The street address and timezone will be looked up automatically. You should change the place name to something meaningful and shorter.
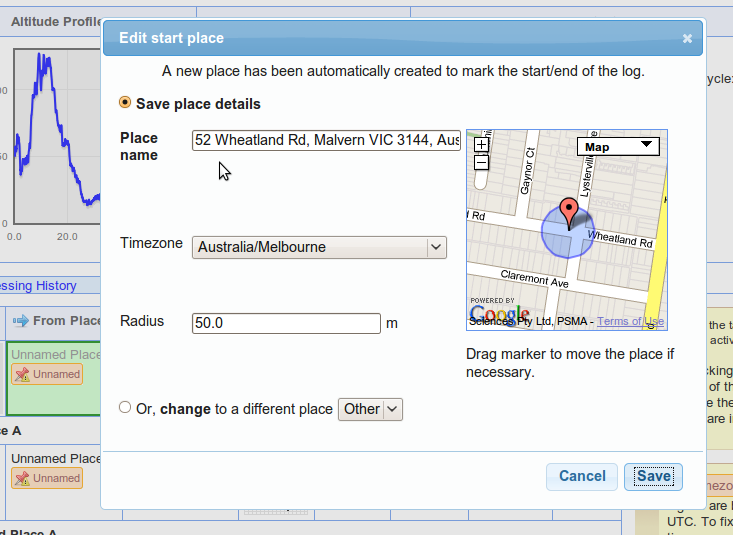
You can move the place marker if you need to, and change the "capture radius" for the place, but the default is usually fine. Moving the place will cause the file to be reprocessed and you'll have to click through from the Uploaded Log Files page again once it's done.
After naming the place, the activity will be updated accordingly. You may need to name other places that appear in your log as well.

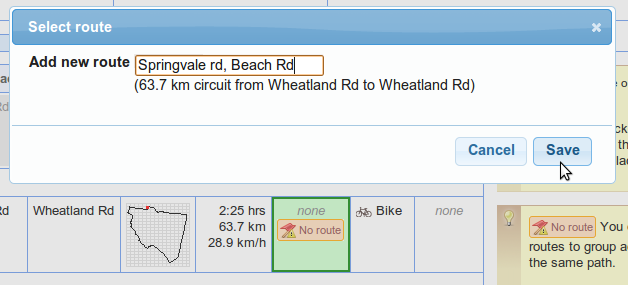
The next step is to name the route. Routes are used to classify and group activity that follow the same general path.
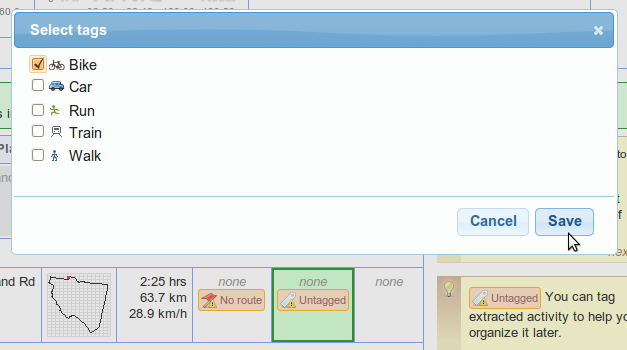
You can also tag the activity according to it's type/purpose.
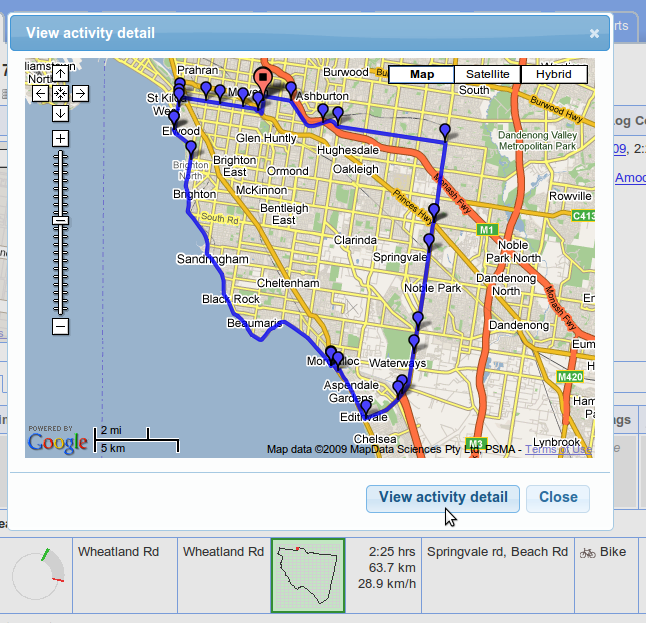
You can click on the activity thumbnail to popup a more detailed map of any segment to help identify the activity. From that popup you can also click through to the activity detail page.
Back on the Uploaded Log Files page, the log file will now show up as blue (instead of yellow) to indicate it has been edited, and the Places, Routes and Tags indicator icons on the right hand side will go green.
Your activity is also visible in the rest of the system classified by places, routes and tags.
So, give it a try yourself and let me know what you think.
| ← Previous post | Next post → |